跨平台軟體建置:CMake 入門
當我們將軟體的價值視為服務時,跨平台就會越來越重要,因為它代表軟體能跨越限制,降低客戶使用成本,進而更快創造價值。工程師可能很難想像,當客戶拿到新軟體時,他需要面對一堆設定問題,還需要建置平台,這會是一件多讓人厭世的事。
常見的跨平台是指,軟體可在三大主流平台上運作,也就是支援 Windows、Linux、Mac;也有些跨平台指硬體平台,像是 x86 或 arm。本文會用 cmake 這個跨平台建置工具,分別建置可於 Windows 與 Linux 上執行的應用程式。
Prerequisite
對於 Windows 的開發者,建議用 MinGW 來建置,這個工具讓 Windows 上有跟 Linux 相同的操作經驗,可以避免二次學習。Windows 10 有很便利的 Package Management Chocolatey,類似 Ubuntu 的 apt 或 Fedora 的 yum,可以用來安裝 MinGW
choco install mingw -yInstall CMake
主角可以登場了,使用 Chocolatey 來安裝 cmake
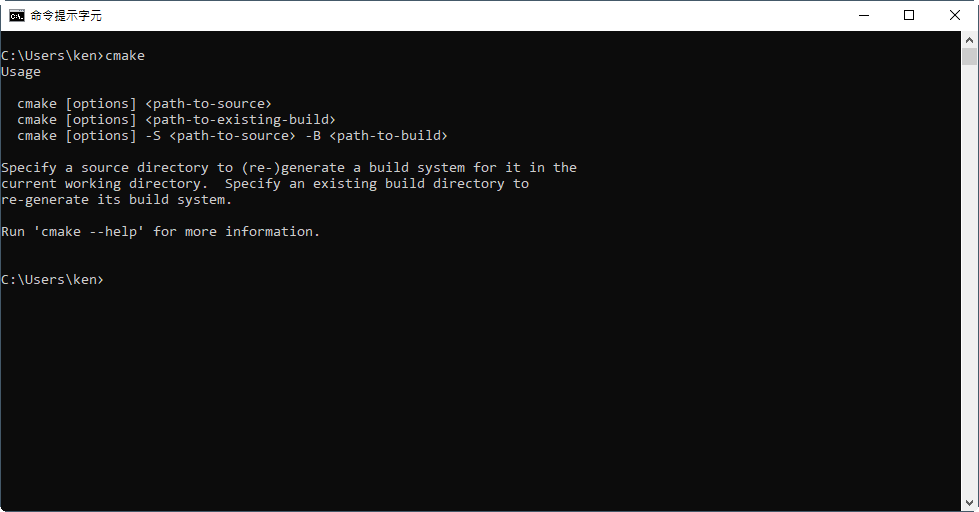
choco install cmake -y安裝完執行
cmake來看是否安裝成功

如果 Command Prompt 找不到 cmake,確認有沒有將 cmake 的執行檔路徑加入 PATH 環境變數。 Command Prompt 會從 PATH 中抓指令,如果沒加的話記得加入並重新啟動 Command Prompt。
Prepare Source Code
先看一下 cmake 的資料夾結構,通常會是
project/
├── build/
├── src/
|   ├── CMakeLists.txt
|   └── hello.c
├── CMakeLists.txt
└── README
build 資料夾用於放置 cmake 的建構文件;src 用於放置原始碼;CMakeLists.txt 類似 GNU 中的 makefile,用於描述應該如何建構檔案。cmake 使用遞迴建構,每個子資料夾中都要放置該資料夾的 CMakeLists.txt。
當建立好資料夾後,在 src 底下產生 hello.c,內容是
#include <stdio.h>
int main()
{
    printf("Hello World!\n");
    return 0;
}
如此一來,環境就準備完成了。
Edit CMake makefile
有了環境後,開始 cmake 的重頭戲:編寫 CmakeLists.txt。先處理最上層專案目錄的 CmakeLists.txt
PROJECT (HELLO)
ADD_SUBDIRECTORY(src bin)
對,兩行,就這樣,有沒有很單純?cmake 的語法是
CMD (ARG)所以這兩行的意思是:(1) 命名專案為 HELLO;(2) 加入子目錄 src,並將產生的目標檔放入 bin 目錄中。
接著來看 src 中的 CmakeLists.txt
ADD_EXECUTABLE(hello hello.c)意思是使用 hello.c 產生 hello 執行檔。
由於專案目錄中的 CmakeLists.txt 會引用到 src 中的 CmakeLists.txt,當 cmake 執行時,它會讀取兩個 CmakeLists.txt,並按照命令來設定建置環境。
Compile for Windows
我們來試著建置 Windows 的應用程式,因為 cmake 的設計原則是將 src 與建置環境分開,不要讓 cmake 產生出來的文件汙染專案,強烈建議進入 build 中建置
cd build
cmake -G "MinGW Makefiles" ..
使用 -G 是選擇 build system 的 Generator;cmake 支援 Visual Studio 專案、MinGW Makefiles、CodeLite 專案等等。由於我們希望操作方式盡量一致,使用與 GNU 風格相同的 MinGW。
此時,會看到 cmake 在 build 下自動產生文件
project/
├── build/
|   ├── bin/
|   ├── CMakeFiles/
|   ├── cmake_install.cmake
|   └── Makefile
├── src/
|   ├── CMakeLists.txt
|   └── hello.c
├── CMakeLists.txt
└── README
看到 Makefile 後,直接反應就是 make 啦
mingw32-make
得到編譯訊息
D:\git\cmake-example\t2\build>mingw32-make
Scanning dependencies of target hello
[ 50%] Building C object bin/CMakeFiles/hello.dir/hello.obj
[100%] Linking C executable hello.exe
[100%] Built target hello
執行檔案
D:\git\cmake-example\t2\build>.\bin\hello.exe
Hello World!
Windows 版本建置完成。
Compile for Linux
將相同的專案複製到 Linux 底下,再次編譯。如果你是使用 Windows 為開發平台,可以使用 WSL 來建構 Linux 環境。執行步驟相同,只是使用 cmake 時不用加 MinGW,下 cmake 前記得清空 build 資料夾
cd build
rm -rf ./*
cmake ..
得到配置訊息
ken@DESKTOP-2R08VK6:/mnt/d/git/cmake-example/t2/build$ cmake ..
-- The C compiler identification is GNU 7.4.0
-- The CXX compiler identification is GNU 7.4.0
-- Check for working C compiler: /usr/bin/cc
-- Check for working C compiler: /usr/bin/cc -- works
-- Detecting C compiler ABI info
-- Detecting C compiler ABI info - done
-- Detecting C compile features
-- Detecting C compile features - done
-- Check for working CXX compiler: /usr/bin/c++
-- Check for working CXX compiler: /usr/bin/c++ -- works
-- Detecting CXX compiler ABI info
-- Detecting CXX compiler ABI info - done
-- Detecting CXX compile features
-- Detecting CXX compile features - done
CMake Warning (dev) in CMakeLists.txt:
    No cmake_minimum_required command is present.  A line of code such as

cmake_minimum_required(VERSION 3.10)

should be added at the top of the file.  The version specified may be lower
    if you wish to support older CMake versions for this project.  For more
    information run "cmake --help-policy CMP0000".
This warning is for project developers.  Use -Wno-dev to suppress it.

-- Configuring done
-- Generating done
-- Build files have been written to: /mnt/d/git/cmake-example/t2/build
進行編譯
make得到
ken@DESKTOP-2R08VK6:/mnt/d/git/cmake-example/t2/build$ make
Scanning dependencies of target hello
[ 50%] Building C object bin/CMakeFiles/hello.dir/main.o
[100%] Linking C executable hello
[100%] Built target hello
執行程式
ken@DESKTOP-2R08VK6:/mnt/d/git/cmake-example/t2/build$ ./bin/hello
Hello World!
如果對檔案格式有興趣,也可以用 file 指令查看
ken@DESKTOP-2R08VK6:/mnt/d/git/cmake-example/t2/build$ file ./bin/hello
./bin/hello: ELF 64-bit LSB shared object, x86-64, version 1 (SYSV), dynamically linked, interpreter /lib64/l, for GNU/Linux 3.2.0, BuildID[sha1]=e7fcca840caa7d5e99bdd0e26bf329b79b7e83fd, not stripped
可看到 ELF 是 Linux 可執行檔格式。
小結
cmake 雖然功能不錯,但學習曲線真的有點陡,別看簡單寫個 hello, world,中間的坑一堆;不是很理解 cmake 反人類的語法是怎麼設計的,跟其他語言差距非常大,剛開始發現沒有 case sensitive 時還很開心,結果程式碼一寫長就覺得風格混亂,維護困難;每個子資料夾都要 CmakeLists.txt 也讓人無言,容易迷路在專案結構中,看不到全貌;最麻煩的是除錯困難,範例又少,要使用 cmake 幾乎無法避免一系列花式踩坑。
但是!對於 C/C++ 的跨平台建構來說,cmake 仍是目前最方便最主流的工具,支援的 Generator 夠多,成熟度也高。如果開發者有使用 autotools 來建構專案的經驗,應該能上手 cmake。我不是要黑使用 Visual Studio 的開發者,但如果習慣 GUI 的人,應該會覺得痛苦指數很高。cmake 有自己的圖形介面,似乎也能跟 Visual Studio 整合,但這就留到日後再來慢慢研究了。