從零開始的 SMTP:以 Python 為例
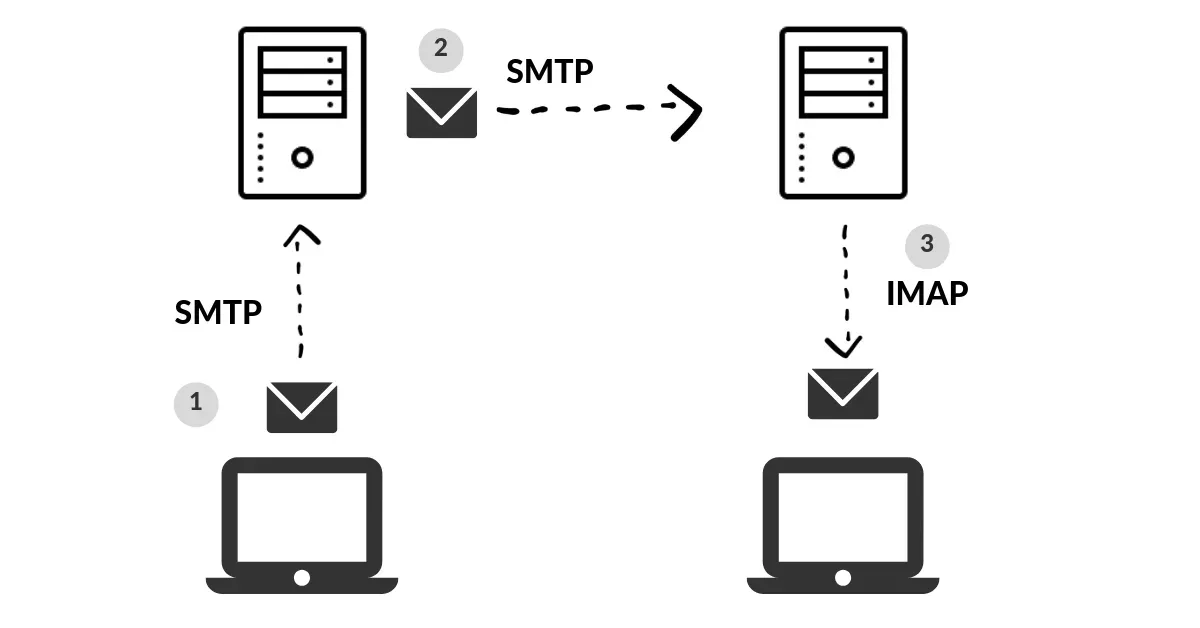
這陣子在重溫 SMTP,想說拿 Gmail 來測試,看看能不能從底層刻出一個簡單的 SMTP Client。沒有其他目的,本文會使用 Python 當範例,一步步實現 SMTP 協議。
Set Gmail
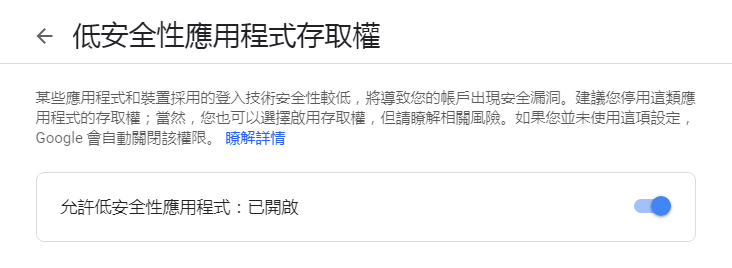
既然是用 Gmail,就要先把 Gmail 設定好。因為安全性的因素,Gmail 會管控部分應用程式,不讓它們登入,很不幸的,我們自己寫的 Python Script 就是所謂的低安全性應用程式。因此在測試前請先到 Google 設定頁面中開啟「允許低安全性應用程式」,測試完後再改回去。
Create a SSL Socket
在寫 Code 前,要先知道 Server 的位置跟 Port,參考 Gmail 頁面的說明
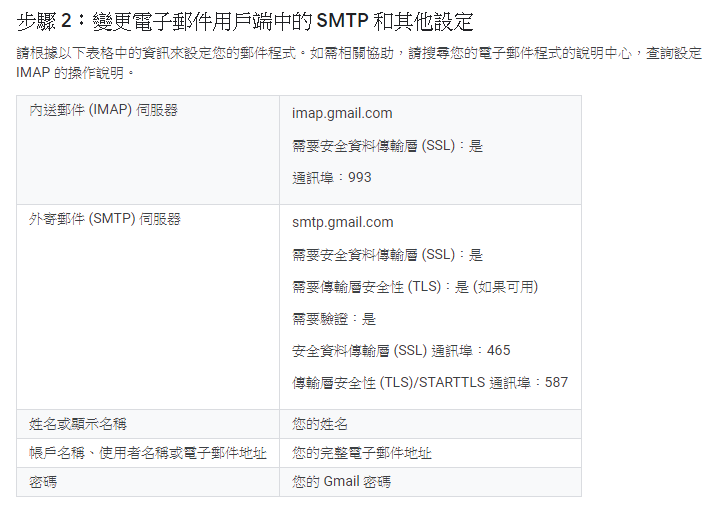
知道 SMTP 的 Server 是 smtp.gmail.com,SSL port 是 465。
創建一個 Socket,用來發送 SMTP
from socket import *
import ssl
import smtplib
import base64

mailserver = "smtp.gmail.com"
mailport = 465

context = ssl.create_default_context()

clientSocket = socket(AF_INET, SOCK_STREAM)
clientSocket.connect((mailserver, mailport))
clientSocket = context.wrap_socket(clientSocket, server_hostname=mailserver)
ssl 是用來加密,如果沒有加密,等於將自己的機密資訊暴露在網路上,現在比較正式的應用都會要求加密。如果沒有用 ssl 就要使用 tls,否則無法連線。
執行 connect 後,host 會跟 server 握手,雙方的連線就完成了。
Hello and Login
SMTP 的 Command 可以參照 RFC 821,連線相關的指令是 HELO 跟 AUTH LOGIN,前者用來通知身分,後者用來登入,記得要用 \r\n 結尾
recv = clientSocket.recv(1024).decode()
print(recv)
if recv[:3] != '220':
    print("220 reply not received from server.")

heloCommand = 'HELO Ken\r\n'.encode()
clientSocket.send(heloCommand)
recv1 = clientSocket.recv(1024).decode()
print(recv1)
if recv1[:3] != '250':
    print('250 reply not received from server.')

heloCommand = 'AUTH LOGIN\r\n'.encode()
clientSocket.send(heloCommand)
recv1 = clientSocket.recv(1024).decode()
print(recv1)
如果前面的操作都順利,應該會收到 server 的回覆
220 smtp.gmail.com ESMTP d6sm6677367pju.8 - gsmtp
250 smtp.gmail.com at your service
334 VXNlcm5hbWU6
後面 334 是等待客戶端輸入,VXNlcm5hbWU6 是經過 base64 編碼後的 username:,簡單講,Gmail 在等登入資訊。
同樣將登入的帳號密碼編碼後傳送給 Gmail
clientSocket.send(base64.b64encode("account".encode()))
clientSocket.send("\r\n".encode())
recv1 = clientSocket.recv(1024).decode()
print(recv1)
clientSocket.send(base64.b64encode("password".encode()))
clientSocket.send("\r\n".encode())
recv1 = clientSocket.recv(1024).decode()
print(recv1)
得到回應
334 UGFzc3dvcmQ6
235 2.7.0 Accepted
看到 Accepted 代表登入成功。
Send Mail
到這裡就可以開始寫信了,使用 MAIL FROM: 標明寄件人,使用 RCPT TO: 標明收件人
mailCommand = "MAIL FROM: <sender[@gmail.com](mailto:[email protected])>\r\n".encode()
clientSocket.send(mailCommand)
recv1 = clientSocket.recv(1024).decode()
print(recv1)
if recv1[:3] != '250':
    print('250 reply not received from server.')

mailCommand = "RCPT TO: <[[email protected]](mailto:[email protected])>\r\n".encode()
clientSocket.send(mailCommand)
recv1 = clientSocket.recv(1024).decode()
print(recv1)
if recv1[:3] != '250':
    print('250 reply not received from server.')
寄件人跟收件人填自己的帳號。
接著用 DATA 表示信件內容
dataCommand = 'DATA\r\n'.encode()
print(dataCommand)
clientSocket.send(dataCommand)
recv1 = clientSocket.recv(1024).decode()
print(recv1)
if recv1[:3] != '354':
    print('data 354 reply not received from server.')
收到
354 Go ahead d6sm6677367pju.8 - gsmtp
表示 Server 等著接收信件內容,這時可以填入正文。正文結尾要用 .\r\n
message = 'Hello, world\r\n.\r\n'
clientSocket.send(message.encode())
recv1 = clientSocket.recv(1024).decode()
print(recv1)
if recv1[:3] != '250':
    print('end msg 250 reply not received from server.')
Gmail Server 就會幫忙寄出這封 SMTP 報文。
Quit
完成後,不要忘記結束跟 Server 的連線,使用 QUIT
quitCommand = 'QUIT\r\n'.encode()
clientSocket.send(quitCommand)
recv1 = clientSocket.recv(1024).decode()
print(recv1)
if recv1[:3] != '221':
    print('quit 221 reply not received from server.')
打開 Gmail,看看成果

小結
簡單用 Python 跑一次 SMTP 的流程,其實就是不斷寫進各種指令,看看會吐什麼出來,好像有點造輪子的感覺?這類基礎打磨好,對熟悉網路通訊協議很有幫助。如果只是要寫應用,Python 有提供 smtplib,可以 call method 直接搞定。或者不一定要用 Python,直接用 telnet 跟 Server 連線也是個方式。