OAuth 2.0:用 Go 跟 Google 要資料
在上一篇的結論中,我們講到開發者通常最想知道,開發 OAuth 2.0 客戶端需要什麼知識。後端工程師要實現 OAuth 2.0,最常見的情境是開發一個客戶端應用,用來存取資源擁有者的受保護資源。因此在這篇中,我們將用 Go 來牛刀小試一番,開發一個網路應用,它會取得使用者同意後,跟 Google 拿取使用者姓名並顯示出來。
註冊客戶端
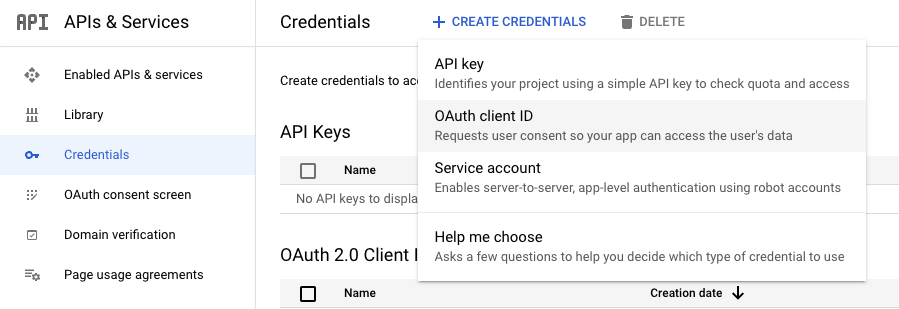
不是隨便哪個應用都能跟 Google 授權伺服器申請授權,要跟授權伺服器互動,首先要人家願意信任你。因此,在開始寫程式前,要先到 GCP 的 APIs & Services 中註冊客戶端,連結是這個
點選 CREATE CREDENTIALS 並選擇 OAuth client ID,創造一個新的客戶端憑證
我們要開發的是個網路應用,Application type 選 Web application。Authorized redirect URIs 是授權伺服器同意的轉址位置,想想,如果今天客戶端要轉到哪,授權伺服器就把瀏覽器轉到哪,連惡意網頁也照轉不誤,這聽起來還挺恐怖的,因此 GCP 希望我們先約定好同意的轉址位置,如果位置不對,授權伺服器會回覆錯誤,不再往下進行。
在這裡,我們開發的應用會跑在本機,轉址位置用
http://localhost:8080/callback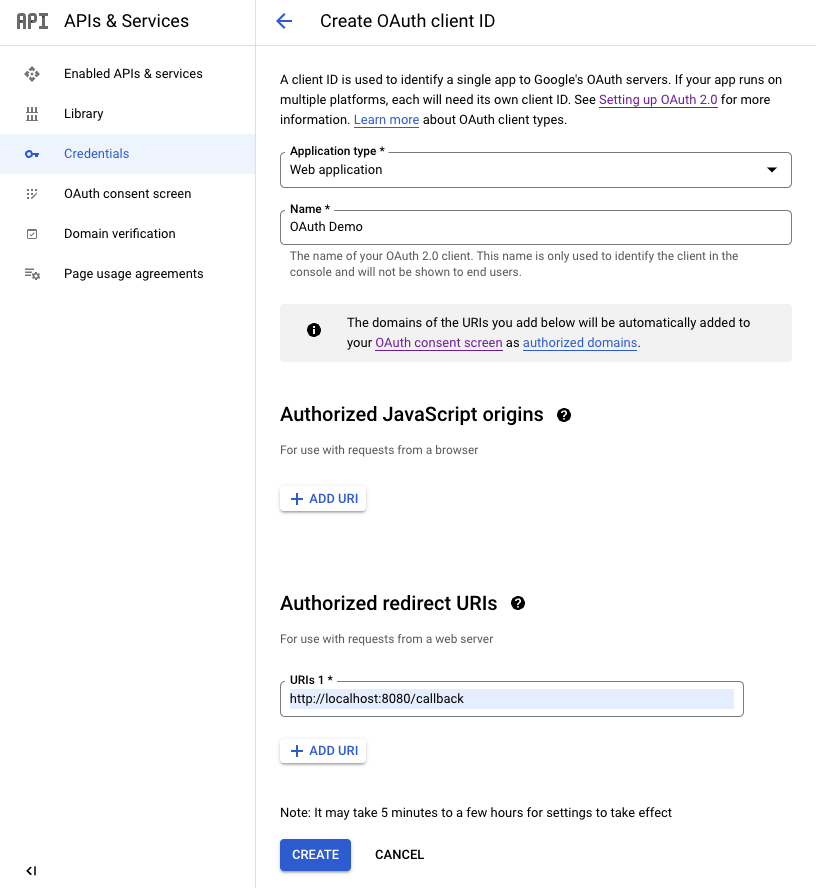
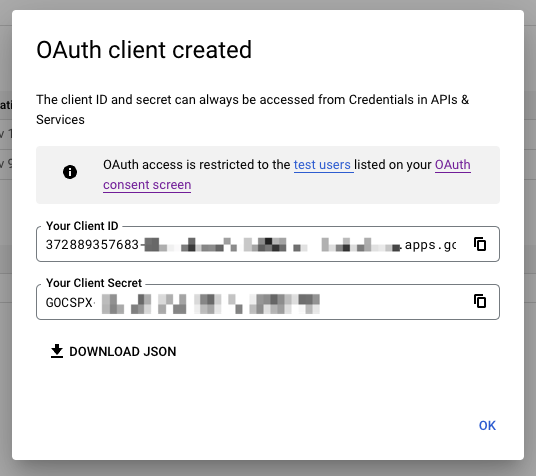
點選 CREATE 後,GCP 會建立客戶端憑證,其中的 Client ID 跟 Client Secret 是兌換 Token 時需要帶的資訊
申請授權
可以開始來開發客戶端了。客戶端本質上是個網路應用,用 gin 搭建簡單的 http server,它會提供一個 API,使用者呼叫後,返回使用者的姓名。
func main() {
    e := gin.New()
    e.GET("name", GetName)
    e.Run("localhost:8080")
}
當然我們現在沒有 Token,要不到姓名,得先跟授權伺服器申請授權碼。因此在 API 前面加一層 middleware,如果沒有 Token 的話,在 middleware 會攔下來,改成跟授權伺服器拿授權碼
func main() {
    e := gin.New()
    e.Use(CheckToken)
    e.GET("name", GetName)
    e.Run("localhost:8080")
}
怎麼申請授權碼呢?Google 有 OAuth 2.0 的庫,並內建各大授權伺服器的端點,拿來用就行了
import (
    "context"
    "encoding/json"
    "errors"
    "io/ioutil"
    "net/http"

    "github.com/gin-gonic/gin"
    "golang.org/x/oauth2"
    "golang.org/x/oauth2/google"
)

func main() {
    cfg = NewGoogleOAuthConfig()
    e := gin.New()
    e.GET("callback", OAuth2Callback)
    e.Use(CheckToken)
    e.GET("name", GetName)
    e.Run("localhost:8080")
}

func NewGoogleOAuthConfig() *oauth2.Config {
    config := &oauth2.Config{
        ClientID:     "372889357683-xxxxxxxxxx.apps.googleusercontent.com",
        ClientSecret: "GOCSPX-xxxxxxxxxx-fmXr0Dc",
        RedirectURL:  "http://localhost:8080/callback",
        Scopes: []string{
            "https://www.googleapis.com/auth/userinfo.profile",
        },
        Endpoint: google.Endpoint,
    }
    return config
}

func CheckToken(ctx *gin.Context) {
    if token == nil {
        ctx.Redirect(http.StatusFound, cfg.AuthCodeURL("state"))
        ctx.Abort()
    }
}
有讀理論有幫助,放進我們剛剛申請的 ClientID 與 Secret,RedirectURL 也用之前約好的 URL。既然是申請授權,也得讓人知道要授權哪些東西,這裡的 Scopes 可以看 Google OAuth 2.0 文件的說明
對,你沒看錯,範圍有、夠、多,請自行針對應用需求找到你要的範圍,我們要的基本上是 userinfo 的 profile,放入
https://www.googleapis.com/auth/userinfo.profile
state 是 CSRF Token,記得要用隨機字串,這裡先敷衍過去(資安風險通常是敷衍後忘了改,好孩子不要學)
ctx.Redirect(http.StatusFound, cfg.AuthCodeURL("state"))
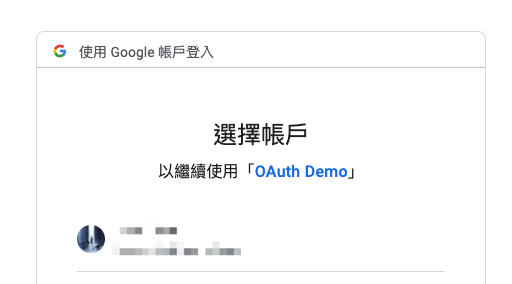
做完這些事後,我們可以預期,使用者打 API 後,會跳轉到 Google 的授權頁面,直到客戶端拿到授權碼,實際上也是
授權伺服器會將授權碼發到接收端點,我們也建立一個,方便它把授權碼丟回來
func main() {
    cfg = NewGoogleOAuthConfig()
    e := gin.New()
    e.GET("callback", OAuth2Callback)
    e.Use(CheckToken)
    e.GET("name", GetName)
    e.Run("localhost:8080")
}

func OAuth2Callback(ctx *gin.Context) {
    state := ctx.Query("state")
    if state != "state" {
        ctx.AbortWithError(http.StatusUnauthorized, errors.New("invalid csrf token"))
        return
    }
    code := ctx.Query("code")
    var err error
    token, err = cfg.Exchange(context.Background(), code)
    if err != nil {
        ctx.AbortWithError(http.StatusInternalServerError, err)
        return
    }
    client = cfg.Client(context.Background(), token)
    ctx.Redirect(http.StatusFound, "http://localhost:8080/name")
}
收到授權伺服器的回應後,記得先確認 CSRF Token 正不正確,避免有人假冒。接著取出授權碼,用它來交換 Token。
Google 的 OAuth 庫很貼心,只要放上 Token,連 HTTP Client 都幫忙生好了,大致是處理一些 HTTP 的設定,例如像是依照 Token 的類型來設定 Header
// SetAuthHeader sets the Authorization header to r using the access
// token in t.
//
// This method is unnecessary when using Transport or an HTTP Client
// returned by this package.
func (t *Token) SetAuthHeader(r *http.Request) {
    r.Header.Set("Authorization", t.Type()+" "+t.AccessToken)
}
處理完授權流程,繼續原本執行到一半的 GET /name,用 Redirect 重定向回去
ctx.Redirect(http.StatusFound, "http://localhost:8080/name")存取資源
跟 Google 拿資源的方式跟呼叫普通的 API 沒兩樣,只是你得先知道要呼叫哪個 API,因為 Google 真的太多服務了,你可以用它的 APIs Explorer 來找。
我們需要呼叫的是 People API 中的 people.get。
依照 API 文件,放上對應的 URL
func GetName(ctx *gin.Context) {
    res, err := client.Get("https://people.googleapis.com/v1/people/me?personFields=names")
    if err != nil {
        ctx.AbortWithError(http.StatusInternalServerError, err)
        return
    }
    defer res.Body.Close()
    var resp map[string]interface{}
    data, _ := ioutil.ReadAll(res.Body)
    json.Unmarshal(data, &resp)
    ctx.JSON(http.StatusOK, resp["names"].([]interface{})[0])
}
呼叫 API 前,記得到 GCP 的設定上,打開 API,要不然還是不能呼叫,連結在這
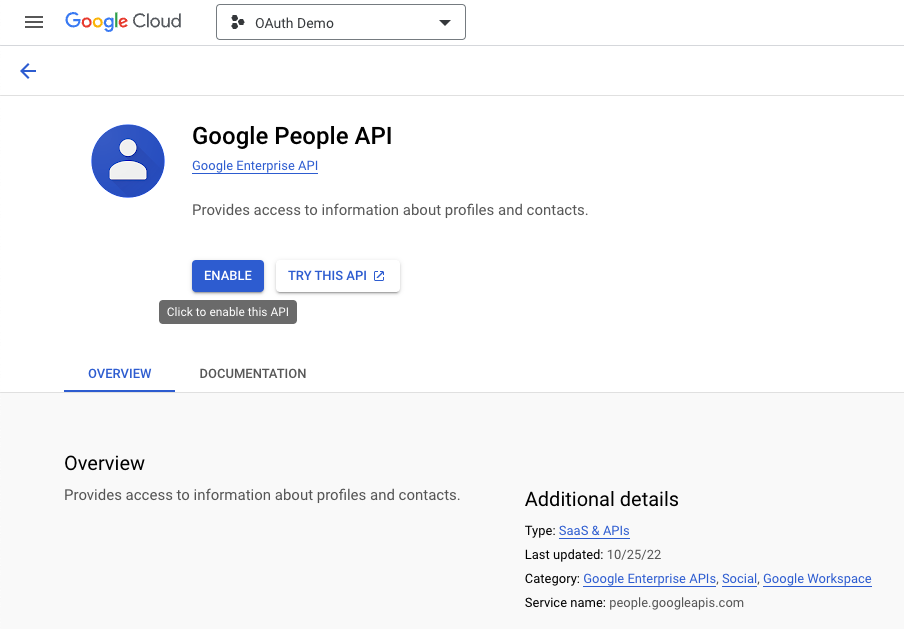
跑一次看結果,打開瀏覽器,輸入
http://localhost:8080/name得到
{
    "displayName": "Ken Chen",
    "displayNameLastFirst": "Chen, Ken",
    "familyName": "Chen",
    "givenName": "Ken",
    "unstructuredName": "Ken Chen"
}
看起來還不錯,有拿到正確的資料。
當然 Google 的 People API 有提供 Go 的 SDK,所以也可以用現成套件,省掉維護的麻煩
go get google.golang.org/api/people/v1修改原本的 function
func GetName(ctx *gin.Context) {
    people, err := service.People.Get("people/me").PersonFields("names").Do()
    if err != nil {
        ctx.AbortWithError(http.StatusInternalServerError, err)
        return
    }
    ctx.JSON(http.StatusOK, people.Names)
}

func OAuth2Callback(ctx *gin.Context) {
    state := ctx.Query("state")
    if state != "state" {
        ctx.AbortWithError(http.StatusUnauthorized, errors.New("invalid csrf token"))
        return
    }
    code := ctx.Query("code")
    var err error
    token, err = cfg.Exchange(context.Background(), code)
    if err != nil {
        ctx.AbortWithError(http.StatusInternalServerError, err)
        return
    }
    client = cfg.Client(context.Background(), token)
    service, _ = people.NewService(ctx, option.WithTokenSource(cfg.TokenSource(ctx, token)))
    ctx.Redirect(http.StatusFound, "http://localhost:8080/name")
}
風格跟 gRPC 有點像,都是稱為 Service,也是用 functional option 的方式來設定,單純從開發者體驗來看,會覺得風格有些強烈。看 Google API 的 Repository,這些 SDK 都是用 generator 產生的,大概也是因為這樣,把抽象層次都拉得比較高。
小結
有另外兩篇理論打底,這篇實作客戶端就輕鬆多了。像 Google 或 Facebook 這類大型公司都有支援 OAuth 2.0 授權,客戶端只需要呼叫 API 就能完成授權流程,開發體驗算是很完整,也有現成的 SDK 跟 Quick Start 降低開發門檻。真要說問題,大概是要知道去哪裡找開發用的資訊。
以 Google 來說,我們這次開發用到四、五個網頁,大致可分為 GCP、Scope 跟 People API。這是因為他們對到的 OAuth 2.0 角色有些不同,GCP、Scope 偏授權伺服器那端、People API 偏受保護資源那端,如果對流程不熟,可能逛一逛就迷路了,不知道怎麼進行下去;另外是對開發生態系的熟悉度,看得出來 Google API 文件資訊架構有經過設計,能理解背後組織的邏輯,應該能幫助開發者更快定位到資源。
希望看完這篇,能讓讀者對 OAuth 2.0 如何落實到實務有個想像。有時候理論講再多都不如親手操作一次來得有感。