MQTT:輕量的消息隊列協定
這幾年隨著物聯網(IoT)越喊越熱,MQTT 這套通訊協定也越來越常聽人提起。物聯網的核心精神是將終端數據傳輸到網路,網路中的運算單元在分析這些數據後,可以將它轉化為使用者想要的應用。在網路中,數據是用通訊協定來交換,而常見的通訊協定 HTTP 結構相對複雜,傳輸成本較高,也更要求終端裝置的效能,而且 HTTP 採用輪詢(Polling)機制來取得資料,需要客戶端頻繁跟裝置拉取訊息,不適合 IoT 的應用;相對的,MQTT 輕量、採用發佈/訂閱模式,更適合 IoT 的傳輸需求。
最常見的 MQTT 工具是由 Eclipse Foundation 維護的 mosquitto,相關工具也都有開源。本文會講解如何使用 Golang 的 mqtt 套件,搭配 mosquitto 的中間人 Broker 服務,走一次 MQTT 的使用。
Prepare Environment
首先要來準備 MQTT 的環境,在實際應用中,為了維護方便,會建議 MQTT 的伺服端架在 Linux 上,客戶端則看具體需求。因為我們只是要驗證概念,就選擇使用 Windows + WSL 作為開發環境,來對應 GUI + Server 配置兩種需要。
WSL 的 mosquitto 安裝方式跟 Debian 相同
sudo apt install mosquitto mosquitto-clients安裝後,開啟服務
mosquitto這樣 MQTT 的伺服端就架好了。接著在 Windows 上安裝 MQTT 客戶端,如果習慣使用 GUI 的話,可以用 MQTT.fx
choco install mqttfx -y開啟 MQTT.fx,設定連線的資料。
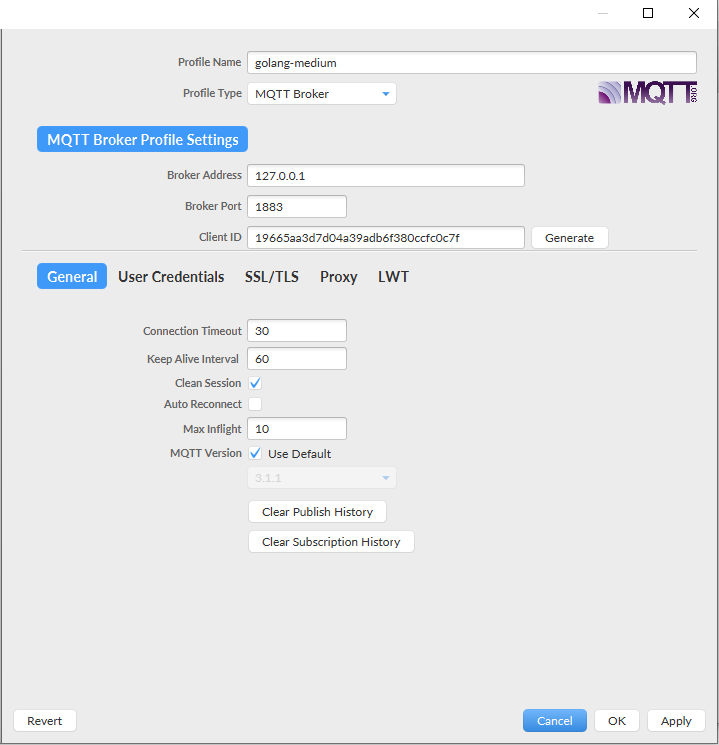
由於伺服器開在本機,Broker 輸入 127.0.0.1;Port 用預設的 1883;Client ID 主要供 Broker 判斷 Client 用,不要重複即可,這邊用亂數。
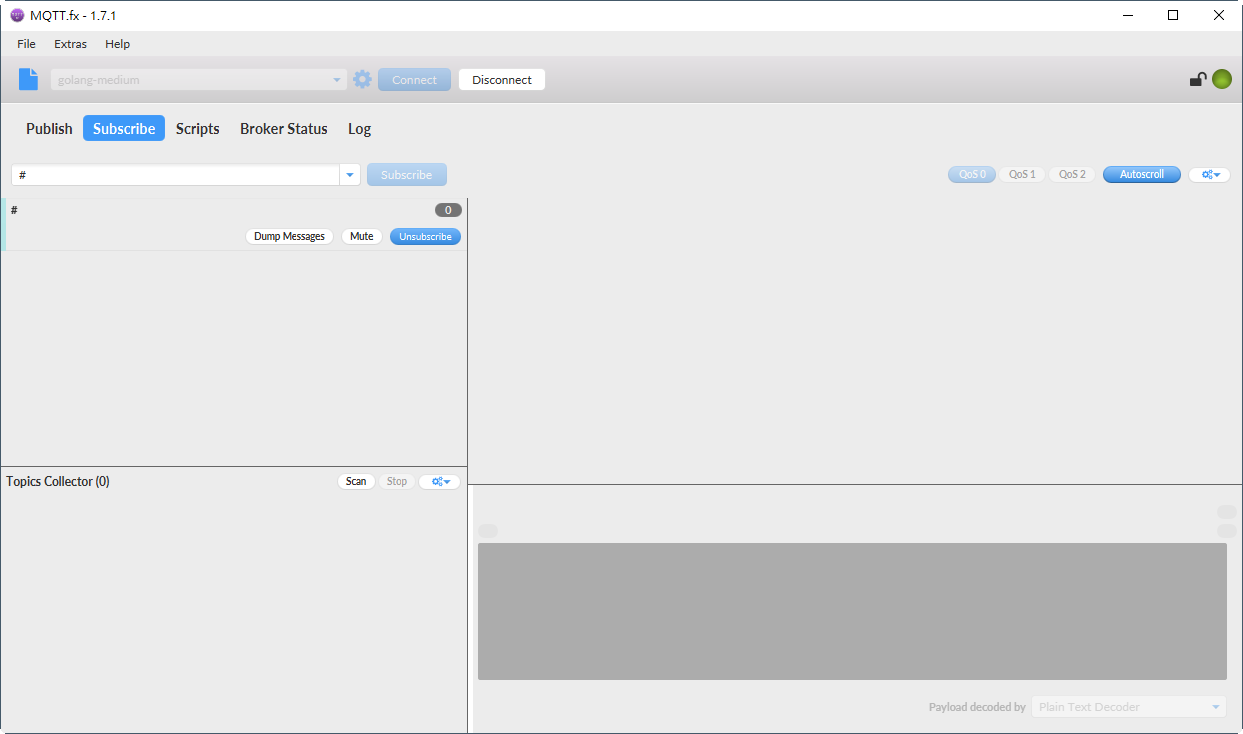
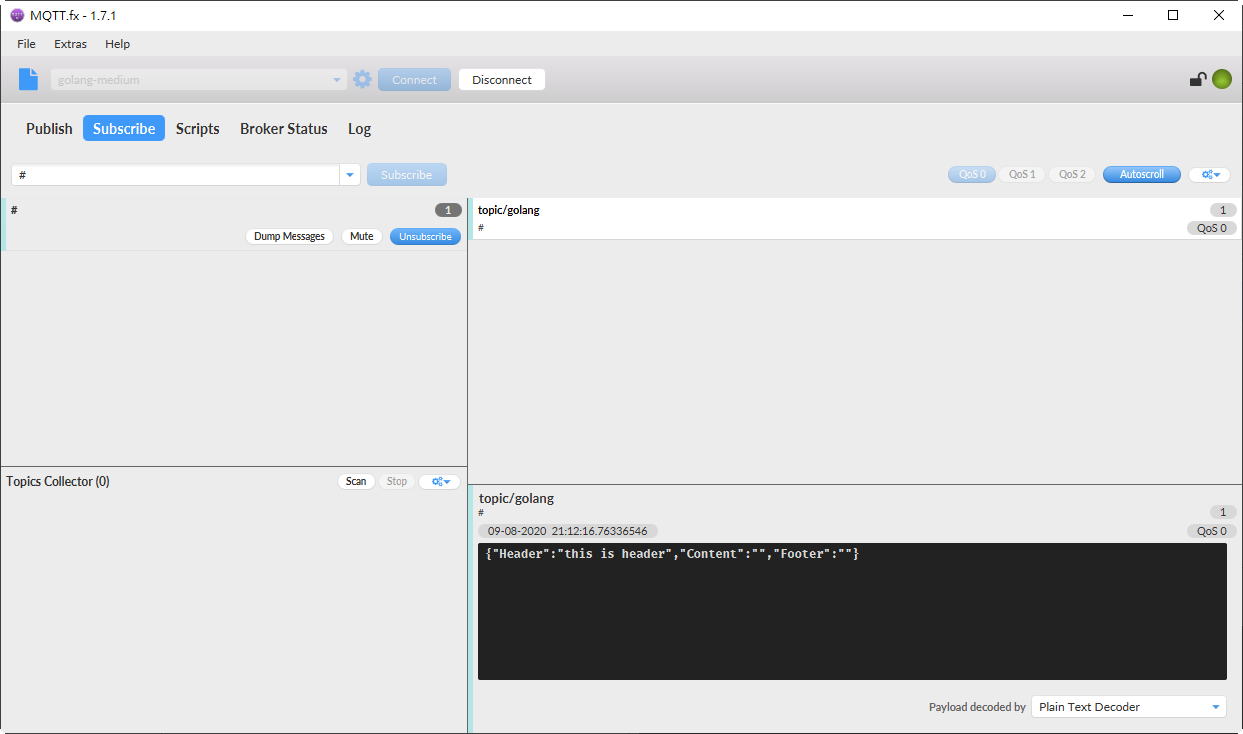
在 Subscribe 的 Tab 中,可以選擇要訂閱的訊息,MQTT 是採用發佈/訂閱架構,Broker 收到發佈者的消息後,會將消息傳送給所有訂閱者。我們可以用通配符 # 來訂閱所有主題。
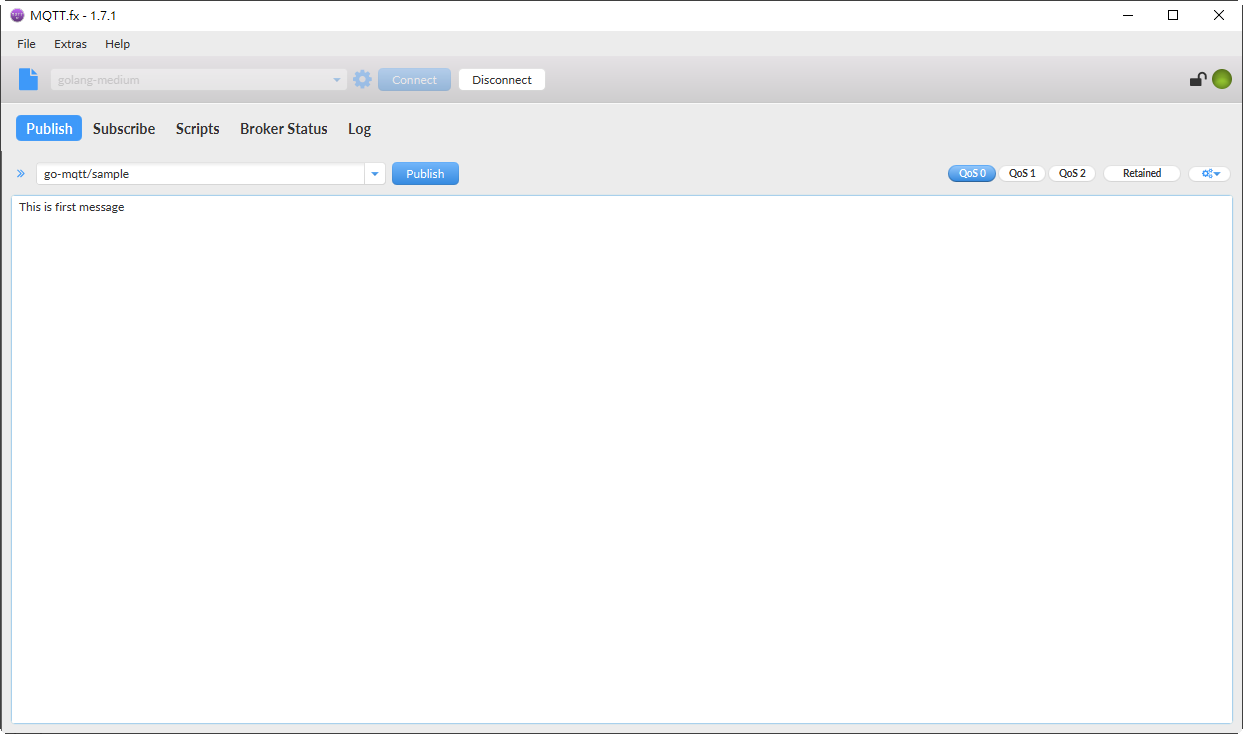
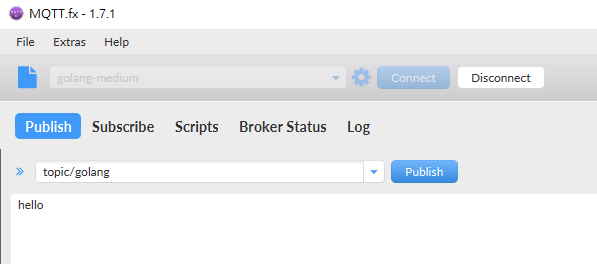
到 Publish 的 Tab,試著發佈一則訊息訊息
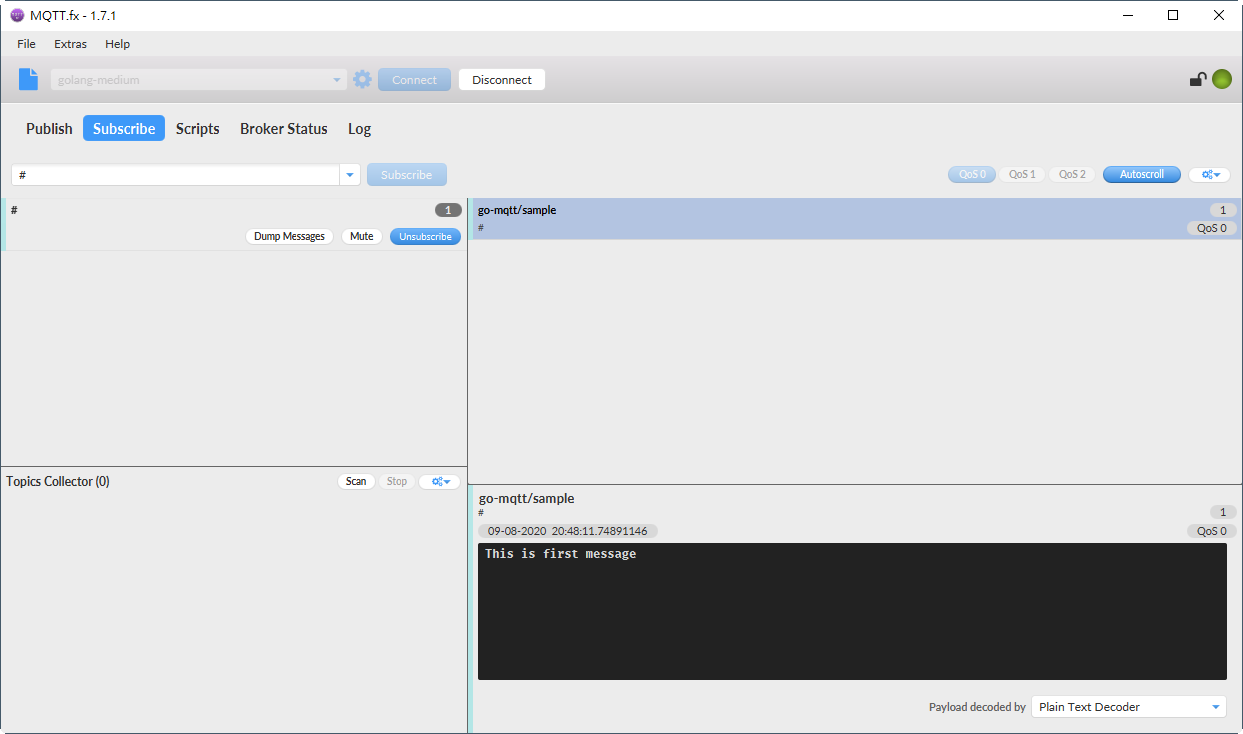
回到 Subscribe,可以看到該訊息已經被接收
有第三方的環境後,就可以拿來驗證自己開發的應用程式是否正確。
Send MQTT Message
建置完環境,開始來開發應用程式,同樣使用前面的專案架構,建立 cmd 並在 pkg 下加入需要的檔案
project
├── cmd
│   └── mqtt
│       └── main.go
├── configs
├── pkg
│   └── mqtt
│       ├── message.go
│       └── mqtt.go
├── go.mod
└── README.md
pkg/mqtt/message.go 用來建立訊息的模型;pkg/mqtt/mqtt.go 用來處理 MQTT 客戶端。
引入需要的 package
go get -u github.com/eclipse/paho.mqtt.golang一個一個來看,pkg/mqtt/message.go 中的訊息格式是
package mqtt

type Message struct {
    Header  string
    Content string
    Footer  string
}
將訊息分為三部分,有 Header、Content、Footer,都是字串。當然用別的格式也行,就看各自需求。
接著 pkg/mqtt/mqtt.go 的內容是
package mqtt

import (
    "encoding/json"
    "fmt"
    "log"
    "math/rand"
    "os"
    "strconv"
    "time"

    mqtt "github.com/eclipse/paho.mqtt.golang"
)

// Client is a mqtt client
type Client struct {
    client mqtt.Client
}

// New mqtt client and connect to broker
func New() Client {
    c := Client{}
    mqtt.DEBUG = log.New(os.Stdout, "", 0)
    mqtt.ERROR = log.New(os.Stdout, "", 0)
    s1 := rand.NewSource(time.Now().UnixNano())
    r1 := rand.New(s1)
    clientID := strconv.Itoa(r1.Int())
    opts := mqtt.NewClientOptions().AddBroker("tcp://127.0.0.1:1883").SetClientID(clientID)

    c.client = mqtt.NewClient(opts)
    if token := c.client.Connect(); token.Wait() && token.Error() != nil {
        panic(token.Error())
    }

    return c
}

// Publish mqtt message
func (m Client) Publish(topic string, payload interface{}) {
    text, _ := json.Marshal(payload)
    token := m.client.Publish(topic, 0, false, text)
    token.Wait()
}
前面宣告一個結構,該結構內有 MQTT 的相關方法,可供應用端調用。
// Client is a mqtt client
type Client struct {
    client mqtt.Client
}
建立一個 New function 將此結構回傳
func New() Client {
    c := Client{}
    mqtt.DEBUG = log.New(os.Stdout, "", 0)
    mqtt.ERROR = log.New(os.Stdout, "", 0)
3、4 兩行的意思是將 MQTT 客戶端的 log 輸出到標準 log 中,方便 Debug。
亂數產生一組 Client ID,並設定 Broker 的 Address,類似前面 MQTT.fx 的設定
    s1 := rand.NewSource(time.Now().UnixNano())
    r1 := rand.New(s1)
    clientID := strconv.Itoa(r1.Int())
    opts := mqtt.NewClientOptions().AddBroker("tcp://127.0.0.1:1883").SetClientID(clientID)
新建一個 MQTT client,並指給 Client 中的 client;使用 Connect 來連線,並用 Wait 跟 Error 來確認連線成功,沒出現問題
    c.client = mqtt.NewClient(opts)
    if token := c.client.Connect(); token.Wait() && token.Error() != nil {
        panic(token.Error())
    }
    return c
}
還要記得加入 Publish,用來發佈訊息
// Publish mqtt message
func (m Client) Publish(topic string, payload interface{}) {
    text, _ := json.Marshal(payload)
    token := m.client.Publish(topic, 0, false, text)
    token.Wait()
}
Publish 需要兩個參數,分別是 Topic 跟 Payload,可以合理預期進來的 Payload 是 Message 格式,因此用 json.Marshal 將它序列化,方便傳輸。
好的,pkg 開發完成,回到應用端,修改 cmd/mqtt/main.go 的內容為
package main

import (
    "example/pkg/mqtt"
    "time"
)

func main() {
    client := mqtt.New()
    payload := mqtt.Message{
        Header: "this is header",
    }
    client.Publish("topic/golang", payload)
}
設定的 Topic 是 “topic/golang”,Payload 的 Header 帶有內容;Content 跟 Footer 為空。
編譯並執行,可以看到
ken@DESKTOP-2R08VK6:~/git/golang-medium-example$ ./bin/mqtt
6966058732451841891
[client]   Connect()
[store]    memorystore initialized
[client]   about to write new connect msg
[client]   socket connected to broker
[client]   Using MQTT 3.1.1 protocol
[net]      connect started
[net]      received connack
[client]   client is connected
[net]      logic started
[net]      logic waiting for msg on ibound
[client]   exit startClient
[net]      outgoing started
[net]      outgoing waiting for an outbound message
[net]      incoming started
[pinger]   keepalive starting
[client]   enter Publish
[client]   sending publish message, topic: topic/golang
[net]      obound wrote msg, id: 0
[net]      outgoing waiting for an outbound message
同時,MQTT.fx 也能看到訂閱的訊息
Receive MQTT Message
如果是對純收集資訊的終端應用,Publish 應該已經能滿足需求了,但有時會需要更細緻的互動,例如出門在外,希望透過 MQTT 發佈訊息,將家裡的電燈關掉,這時就會要求終端需要具備 Subscribe 的能力。
作法很單純,修改 pkg/mqtt/mqtt.go,加入 Subscribe
// Subscribe mqtt message
func (m Client) Subscribe(topic string) {
    if token := m.client.Subscribe(topic, 0, nil); token.Wait() && token.Error() != nil {
        fmt.Println(token.Error())
        os.Exit(1)
    }
}
Client 已經可以訂閱主題了,但收到主題後希望進行什麼處理呢?因此加入 Handler,在收到訊息後,將 Topic 跟 Payload 印出,並將這個 Handler 設為預設的處理方式
var f mqtt.MessageHandler = func(client mqtt.Client, msg mqtt.Message) {
    fmt.Printf("TOPIC: %s\n", msg.Topic())
    fmt.Printf("MSG: %s\n", msg.Payload())
}

// ...

func New() Client {
    // ...
    opts.DefaultPublishHandler = f
    // ...
}
應用端也跟著修改
func main() {
    client := mqtt.New()
    payload := mqtt.Message{
        Header: "this is header",
    }
    client.Publish("topic/golang", payload)
    client.Subscribe("topic/golang")
    time.Sleep(30 * time.Second)
}
後面加個 Sleep 30 秒,讓應用程式不要立刻結束,才能看到訂閱的訊息。
同樣編譯並執行,在程式執行期間,使用 MQTT.fx 發佈訊息
在 Golang 可以看到對應的消息印出
[net]      received publish, msgId: 0
[net]      putting msg on onPubChan
[net]      done putting msg on incomingPubChan
[net]      logic waiting for msg on ibound
TOPIC: topic/golang
MSG: hello
[pinger]   ping check 20.0000549
Encrypt Message
如果訊息的傳輸是在內網,使用未加密的傳輸就行了,但如果訊息會通過公有網路進到伺服器,就需要對訊息進行加密了。TLS 是常用的安全協定,只要讓 MQTT 跑在 TLS 上,MQTT 的訊息就會被加密,即使第三方透過網路竊聽,也無法取得訊息內容。
現代的訊息加密都是透過信任鍊的方式,具體可以參照這篇的說明,不再贅述。為加密訊息,要先有 CA 簽證,因為是自己開發的東西,使用自簽 CA 來做為信任鍊的基礎。
先產生一組 CA 用的私鑰 ca.key
openssl genrsa -out configs/mqtt/ca.key 2048使用這組私鑰來產生自簽證書 ca.crt
openssl req -new -x509 -days 365 -sha256 \
    -subj "/[C=TW/ST=Taipei/O=FOO/OU=BAR/CN=ken00535.com/[email protected]](mailto:C=TW/ST=Taipei/O=FOO/OU=BAR/CN=ken00535.com/[email protected])" \
    -key configs/mqtt/ca.key \
    -out configs/mqtt/ca.crt
再產生一組 server 用的私鑰 server.key
openssl genrsa -out configs/mqtt/server.key 2048再產生憑證簽發的請求檔 csr
openssl req -new -sha256 \
    -key configs/mqtt/server.key \
    -subj "/C=TW/ST=Taipei/O=FOO/OU=BAR/CN=ken00535/[email protected]"
    -out configs/mqtt/server.csr
使用 CA 簽發請求檔
openssl x509 -req -CAcreateserial -days 365
    -CA configs/mqtt/ca.crt \
    -CAkey configs/mqtt/ca.key \
    -in configs/mqtt/server.csr \
    -out configs/mqtt/server.crt
完成一組球員兼裁判的簽發程序。簽發完成的證書 server.crt 可以用來做為 Broker 的證書,同樣的步驟跑一次,可以再產生一組 client.crt 做為 client 的證書,供雙向驗證用。為了方便,先都統一使用 server.crt。
接著產生一份 mosquitto 的設定檔,在其中加入
cafile configs/mqtt/ca.crt

# Path to the PEM encoded server certificate.
certfile configs/mqtt/server.crt

# Path to the PEM encoded keyfile.
keyfile configs/mqtt/server.key
放入認證用的證書。啟動 Broker 時帶入這組設定
mosquitto -c configs/mqtt/mosquitto.confBroker 就能被認證與加密了。
同理,Client 端也需要設定加密程序,新增 pkg/mqtt/tls.go 來產生加密設定
package mqtt

import (
    "crypto/tls"
    "crypto/x509"
    "io/ioutil"
)

func NewTLSConfig() *tls.Config {
    certpool := x509.NewCertPool()
    pemCerts, err := ioutil.ReadFile("configs/mqtt/ca.crt")
    if err == nil {
        certpool.AppendCertsFromPEM(pemCerts)
    }

    // Import client certificate/key pair
    cert, err := tls.LoadX509KeyPair("configs/mqtt/server.crt", "configs/mqtt/server.key")
    if err != nil {
        panic(err)
    }

    // Create tls.Config with desired tls properties
    return &tls.Config{
        RootCAs:            certpool,
        ClientAuth:         tls.NoClientCert,
        ClientCAs:          nil,
        InsecureSkipVerify: true,
        Certificates:       []tls.Certificate{cert},
    }
}
使用 tls.Config,在 RootCAs 放入 CA 證書;在 Certificates 放入客戶端的證書與私鑰。即可完成設定。
再修改 pkg/mqtt/mqtt.go,套用設定到 Client 端
tlsConfig := NewTLSConfig()
opts.SetTLSConfig(tlsConfig)
也要記得修改 tcp 為 tcps,表示套用 tls
opts := mqtt.NewClientOptions().AddBroker("tcps://127.0.0.1:1883").SetClientID(clientID)
MQTT.fx 也跟著加入設定

可以用 Wireshark 來比較一下加入 tls 前後的差別,在未加密的模式下,能輕易看到 Topic 跟 Payload 的訊息
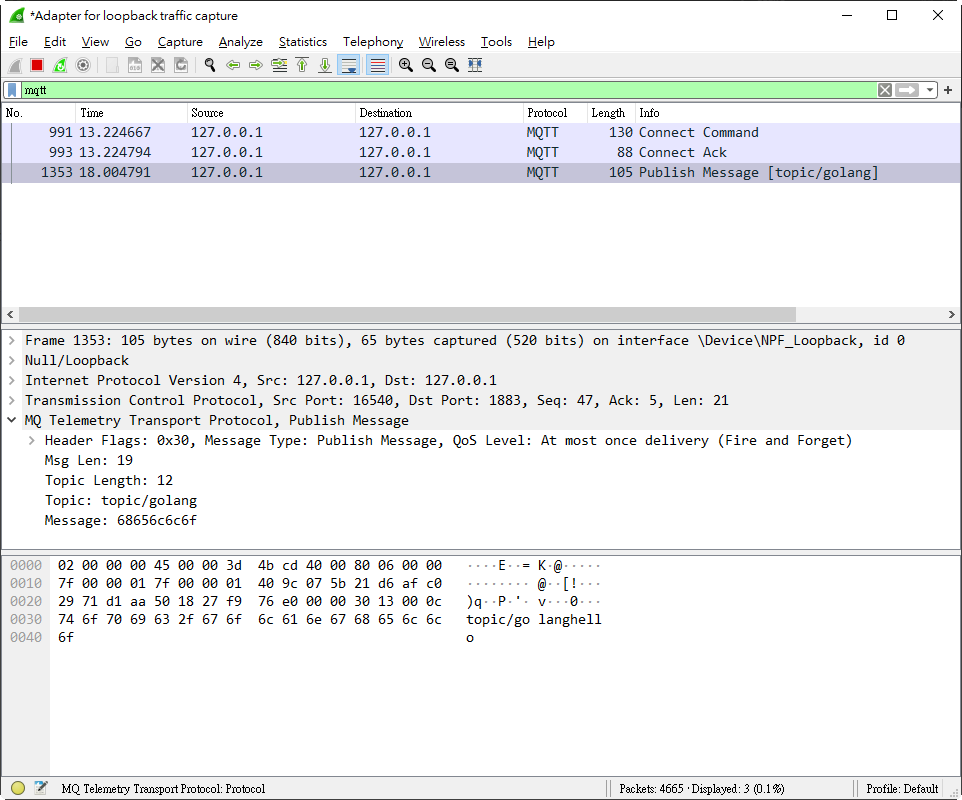
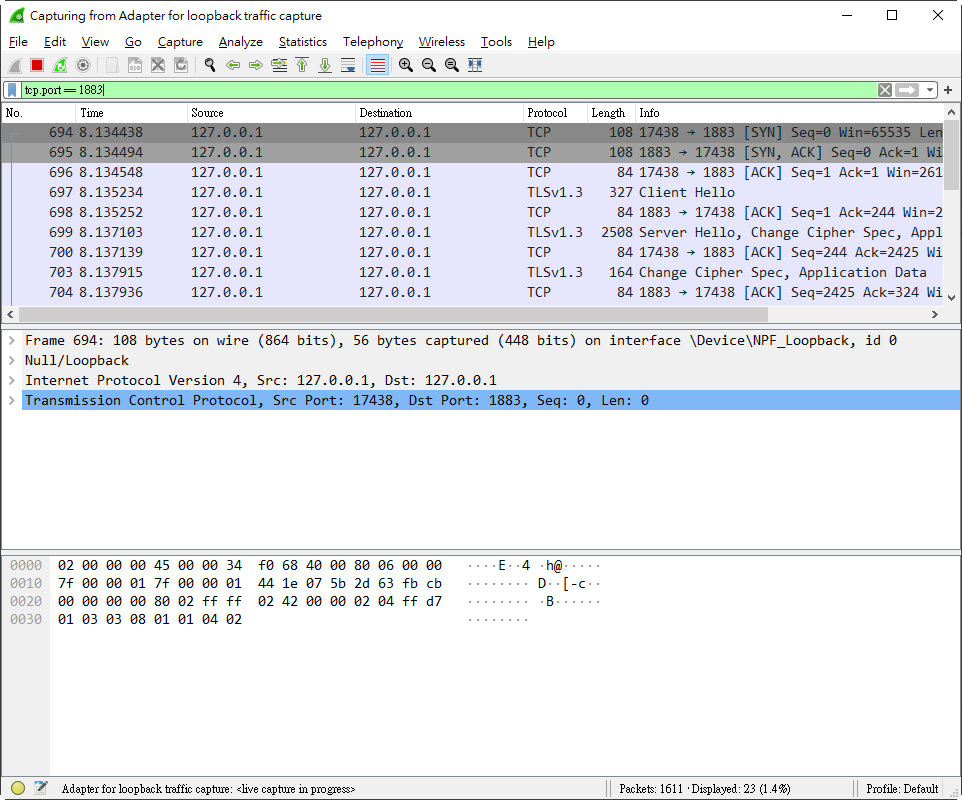
如果是已加密,則只能看到 TLS
小結
MQTT 在 IoT 的應用上,應該會越來越常見,Golang 在 IoT 的優勢是跨平台編譯,只需要在 PC 上開發完後,就能編譯出 Arm 架構的 Binary Code,至於底層編譯有沒有對 Arm 優化就不得而知了。我覺得 Golang 的主要應用應該還是會落在 Server 端的 Application 開發,而 MQTT 比較像是扮演一個輕量的資料交換格式,用於初期或低負載的情境。
另個可以探索的題目是 mosquitto 的負載能力。因為 IoT 多是高頻輕負載的資訊傳輸,當連線數達到極限時,仍然要處理負載平衡的問題;應用端也可能需要有個 Message Queue 的緩衝機制,避免瞬間流量進來衝垮伺服器,或者沒有收到該收的資料。整個商業情境要處理的事還挺多的,也許後面有機會可以再試著討論看看。